Auto-scaling Your Web Servers in OCI

One of the great benefits of the cloud is elasticity: the ability to scale up and down the number of servers that perform a specific task. This is certainly a core capability of Oracle Cloud Infrastructure and its remarkably easy to achieve. In this article, I’ll walk you through the process of creating a web server compute instance (Apache with PHP 7.x) with a load balancer, and how to create an Instance Configuration, Instance Pool and an Auto-scaling Configuration to provide the rules for when to add or remove additional instances of the web server to support the load.
We will start by creating a web server instance using Apache and PHP. We will also install a stress-inducing application (named, “stress”, oddly enough) so we can artificially increase the CPU load at will.
Note: This may not work if you are on a Trial Account because most trial accounts do not have the capacity to scale up to 4 identical servers (usually it stops you at 2 servers). However, if you want to follow along using a trial it should work as long as you understand your max number of servers will be 2.
Create a Virtual Cloud Network
From the main menu select Networking -> Virtual Cloud Networks. Click on the Start VCN Wizard button to create a new VCN.

Be sure to select the VCN with Internet Connectivity option. Then press the Start VCN Wizard button.

Enter a name for your VCN (I choose VCN_Autoscale, but the actual name you choose is not important). You may want to review the default selected compartment. I used my Demo compartment. I accepted the rest of the default values and just pressed the Next button. In the Review and Create page, press the Create button to create your VCN.
Your VCN will be created almost immediately. You can review it if you like. Our next step is to create a load balancer for this VCN. We will later configure this load balancer to auto-scale our web servers.
Create a Load Balancer
Use the main menu again and navigate to Networking -> Load Balancers. Press the Create Load Balancer button to start the wizard. Configure your load balancer as shown below. It is important to select the public subnet because only public subnets can receive traffic from the internet gateway.

Press the Next button. Configure the next page in the wizard as shown. As you can see, we have reduced the default times for the health check and timeouts by 90%. We also added a URL path to a file that we will use to perform our health checks. We expect that file to contain the word SUCCESS and we expect to get an HTTP Status code of 200 everytime the health check is performed..

Note on the Response Body Regex: Do not include a formatted RegEx expression in this field (despite the name). Just put in some simple text. OCI will automatically take your simple text and use it in an internally generated RegEx when it performs the health check. If you supply an actual RegEx expression, it will fail.
Do Not check the Use SSL checkbox for our purposes. I’ve covered using SSL in another article. I’m not using it in this article for the sake of brevity. Press the Next button when you are ready.
Be sure to select the HTTP option and not the HTTPS option! The port will automatically default to 80 when you select HTTP. It’s fine to keep the default listener name. Press the Submit button when ready.

Our load balancer is now complete. It automatically created an empty backend set for us. A backend set is the set of servers across which it will load balance. We want it to be empty for now because will will fill it later using using a pool of instances.
Create Your Web Server
Our next step will be to create the web server that will act as our “template” for all of the servers that will be automatically created in our instance pool. From the main menu, select Compute -> Instances. Press the Create Instance button near the top to create the instance that will be our template.
I named my server WebServerTemplate but the name you choose is really not important. Just ensure that it is in the VCN you created earlier and is in the public subnet of the VCN. Most of the defaults should be fine. The only thing you need to do (other than set the name) is to ensure that the Assign a Public IP Address radio button is selected and to specify your public SSH key with the instance so you can connect to is via SSH later, when we configure the software load on the server. If you are unsure of how to create or specify your public SSH key, please refer to my article on getting started with OCI. Press the Create button when you are ready.
It will take a minute or so to fully provision your new compute instance. Wait until the large, colored box changes from amber to green. Once it turns green, your instance is ready to be used. You will also see the status name changes to Running.

Make a note of the public IP address for your compute instance. We will use it to open an SSH session with the instance and continue with the software installation. In the screenshot above you can see that my compute instance has a public IP address of 129.146.133.165. Directly underneath that you can see that the username is specified as opc. Using this information, we can SSH to the instance by opening a command console (aka a terminal window) and executing the command:
ssh opc@129.146.133.165
Installing Apache Web Server
To install the Apache software from within our SSH session simply execute the following command:
sudo yum install httpd -yAfter that, we need to ensure that the server starts by default if the compute instance restarts. The following command will take care of that:
sudo systemctl enable httpdLet’s also force the start of the Apache server with the following command:
sudo systemctl restart httpdAt this point, Apache is installed and running.
Installing PHP
This follows the standard process for installing PHP for Apache.
sudo yum install https://dl.fedoraproject.org/pub/epel/epel-release-latest-7.noarch.rpmsudo yum install http://rpms.remirepo.net/enterprise/remi-release-7.rpmsudo yum install yum-utilssudo yum-config-manager --enable remi-php73sudo yum install php php-mcrypt php-cli php-gd php-curl php-mysql php-ldap php-zip php-fileinfo
Be advised that many of these commands will require your acceptance by typing in a y in the terminal. Now you can check the version of PHP that has been installed from the command line:
php -vWhich should show you the following (though your specific version numbers may be different):

Now that PHP is installed, we need to restart our APache server to correctly serve up PHP files. Execute the following command to restart Apache:
sudo systemctl restart httpd
Installing stress
Stress is a utility for increasing the level of stress on a system. We will use it to increase the CPU load later on in this article so we can see the auto-scaling of web servers in action. Installing stress on the compute instance is a breeze. Simply execute the following command:
sudo yum install stress
Press the y key when prompted to agree to the installation.
Create our Web Page and Health Check Files
By default, Apache looks for its html and php files in the /var/www/html directory. Our first step is to create an index.php page that also shows the IP address of the server. We do this so we can easily see the load balancer in action. Still in your SSH session, execute the following command:
sudo vi /var/www/html/index.php
Edit the contents of the file to match the following:
<html>
<head>
</head>
<body>
<h1>Compute Instance</h1>
<?php
$serverIP = $_SERVER['SERVER_ADDR'];
echo "Server IP $serverIP";
?>
</body>
</html>
Note: if you do not explicitly provide an index.html or index.php and simply rely on the automatically generated Apache2 web page, the http status code that is returned is 403, not 200!
Save that file and exit vi. Now execute the following command to create the test.txt file:
sudo vi /var/www/html/test.txt
Edit the contents of the file to match the following:
SUCCESS
Save the file and exit vi.
Note: If you are not familiar with using vi as an editor, please check out this cheat-sheet on it’s commands. It’s old-school, but pretty simple for what we are using it for.
We are done with SSH at this point. Feel free to close your SSH connection. We won’t need to touch SSH again until we get into testing the load balancer and autoscaling rules at the end of this article.
Editing the Security List
As I mentioned earlier, opening a port in the firewall of the server is not sufficient to allow internet traffic to reach it. OCI itself maintains a virtual firewall, in the form of security list(s) which also control access to subnets and their contents.
Using the main menu in the OCI web console, navigate to Networking -> Virtual Cloud Networks. Then click on the VCN_Autoscale link to see the details of your VCN. On the left side of the page, click on the Security Lists link as shown below.

By default, your VCN will contains 2 security lists. One for the public subnet (which is the one we are interested in) and one for the private subnet (which we are not using in this tutorial). Click on the Default Security List of VCN_Autoscale so we can edit it.

Security lists are divided into two parts; ingress rules (that define the traffic that is allowed to enter a subnet) and egress rule (that define the traffic that is allowed to leave the subnet). If you examine the ingress rules in the screenshot below, you can see that any TCP traffic to port 22 is allowed (which is why our SSH session could connect) along with 2 more rules for ICMP traffic, which are created by default.

We need to add a rule that allows TCP traffic over port 80 from any source. Sources are defined as CIDR blocks and the source CIDR block of 0.0.0.0/0 means “from any source”. If you are not familiar with CIDR blocks and want to learn more, check out my Youtube video on the topic.
Press the Add Ingress Rule button and add a rule as shown below:

Press the Add Ingress Rules button to confirm your changes. Now you can open up a web browser and point it at your public IP address and you’ll see a page like the following:

The server IP address that is listed is always the private IP address. That is because the public IP address is an ephemeral IP, and therefore not directly associated with the virtual network interface card (VNIC).
You may also have noticed that this worked without us having to create an egress rule in the security list. Why is that? Well, it’s because we created a stateful security rule. Stateful rules perform connection tracking, which means that OCI knows how to route the response out. If we had created a stateless rule instead, we would have to create an egress rule, because connection tracking would not be performed and the ingress and egress events would be treated as two separate events entirely.
For more detail on stateful vs. stateless security rules, please refer to the offical documentation at https://docs.cloud.oracle.com/en-us/iaas/Content/Network/Concepts/securityrules.htm#stateful.
Creating a Custom Image
Now that we have a good, working compute instance configured with the installed software that we want, we need to create a custom image from it. A custom image is like a snapshot of the compute instance, installed software and all. We can then use the custom image to create exact replicas of this compute instance; only their IP addresses will change from one instance to the next.
Navigate to the details page of your WebServerTemplate compute instance. Click on the More Actions button and select Create Custom Image option.

Name the image WebServer_CI and press the Create Custom Image button.

This will temporarily take your WebServerTemplate instance offline while the custom image is created. A custom image is essentially a bit-for-bit copy of your compute instance, so it needs to be offline to ensure that nothing changes. It will take a couple of minutes to complete this process. Once the process is complete you can continue.
When it completes, you can check your custom image by using the main menu to navigate to Compute -> Custom Images. There you can see some details of your custom image.

Now that you have a custom image, you can safely terminate (the OCI term for “delete”) your original WebServerTemplate instance. We won’t be using it anymore so we may as well free up the resource now. You can do this by navigating to the details screen of the WebServerTemplate instance and selecting More Actions -> Terminate. I recommend deleting the boot instance also when you are prompted.
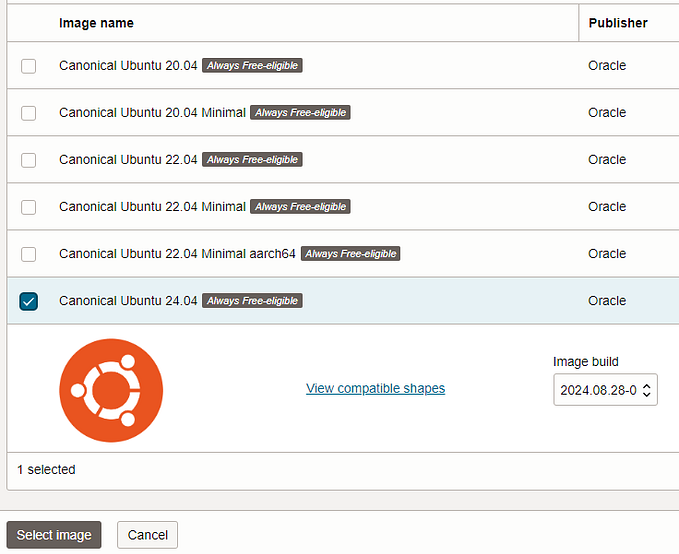
Now, we need to create a new compute instance based on that custom image. I’ll explain why in just a bit. First, let’s get our new compute instance created. Navigate to Compute -> Instances and press the Create Instance button. Name the instance WebServerTemplate2 (or accept the default name, it does’t really matter because we will delete this instance in a few more steps). Press the Change Image button.

Select the custom image that you just created.

Complete the rest of the creation process normally (ie specify that you want a public IP and provide your SSH public key). Create the instance and wait for it to change to the RUNNING state before moving on.
Instance Configurations
We’ve done a fair bit of work up to this point. We have:
- Created a VCN
- Created a load balancer
- Created and configured a web server
- Added a security rule to the public subnet security list that allows for traffic on port 80
- Created a Custom Image
- Created a compute instance based on the custom image
Now the real fun begins because we have all of the working pieces we need to create an auto-scaling configuration. There are only a few more steps and they are pretty quick and easy.
Create an Instance Configuration
An instance configuration is basically a mapping of an image to a shape. You create an instance configuration based on a compute instance that has both the image and the shape defined. If you take a quick look at the details page of your WebServerTemplate2 instance, you can see the image and the shape that define it.

An instance configuration is somewhat similar to a custom image. It lets you define the settings used when creating a compute instance. It's much less heavy-weight than a full custom image.
To create an instance configuration, click on the More Actions button and select the Create Instance Configuration option, as shown below.

Be sure your compartment is selected and provide a name (optionally) for your instance configuration. Press the Create Instance Configuration button and the instance config is immediately generated, without taking your compute instance offline. How can it act so quickly? Because it’s really just creating a map of the image and the shape. When it’s complete, you’ll see the instance configuration detail screen, as follows:

Create an Instance Pool
Now it’s time to create the instance pool. Click on the Create Instance Pool button (it's on the Instance Configuration page that you should be viewing now). Set the name to web_server_pool and set the Number of Instances to 3. Press the Next button.

On the next step in the wizard, you are prompted to choose the Availability Domains in which you want this pool to exist. It’s best to have the pool exist in multiple availability domain just in case some localised disaster disrupts one of the Availability Domains. Of course, if your VCN was created in a region that only has one Availability Domain, you’ll be limited to that. In my case, I’m working in the US-West-Phoenix region which has 3 ADs, so I added each AD to my pool. You will also want to check the Attach a Load Balancer checkbox at this time.

When to check the load balancer checkbox, a new part of the page appears prompting you for the load balancer information. Select your load balancers and backend set from the dropdown lists. Be sure to specify port 80. Press the Next button to continue.

On the Review page, click the Create button to create the instance pool. This will start the provisioning process for the pool and create all 3 instances defined in the pool. Wait for this process to complete and have the colored box turn to green before proceeding.

We are almost done! The instance pool by default provisions all of the instances that were specified by the pool. It’s only in the next step, where we create the auto-scaling configuration, that we provide OCI with the information it needs to intelligently manage the number of instances that are running.
Create an Auto-scaling Configuration
Once the instance pool is in the Running state, you can select the More Actions button and select the Create Autoscaling Configuration button.

Creating the Autoscaling Configuration is pretty simple. Be sure the compartment is correct and the instance pool you just created is selected in the dropdown list. Press the Next button to continue.

Here is where you really define the rules for the autoscaling policy. Be sure to select Metric-based Autoscaling. It scales based on the metrics that we define in the policy (CPU utilization in this tutorial). Schedule-based Autoscaling is good if you know that you get increases and decreases in traffic at certain times of the day.
The cooldown is set to 300 seconds (5 minutes). This is the minimum period of time that must pass between scaling actions.
Fill out the page as shown below. We want to scale up the number of instances if the CPU utilization exceed 70% (that’s 70% of ALL active instances combined, not just a single server’s usage). We want to scale down the number of servers when the overall CPU utilization falls below 69%. We always want at least 1 instance running, so set the minimum to 1. We do not want to scale past 4 instances, so 4 is our maximum, and we want to start out at 3 instances when everything starts fresh, just in case there is any existing load. Press the Next button when ready.

Note: When I first set my auto-scaling policy. I set the Scale-In Operator at < 69%. It turns out that this was way too aggressive a number. If you think about it, when I run stress on the first instance, it will shoot the CPU usage to 100%. When the second instance is added to the pool, the CPU usage will drop to 50% or lower. By setting the Scale-In to 69%, my instance pool was constantly (well, every 5 minutes) scaling up or down.

It turns out the setting the Scale-In to 49% was a much more effective number, allowing the pool to stabilize at 2 instances if one was at 100% load. As usual when it comes to performance tuning of anything, make your assumptions, but verify them with facts from the real world!
On the Review page, press the Create button. The autoscaling policy is created in just a few seconds.

Now take a look at your compute instances. You should have 4 running at this point. The 3 from your instance pool, and the one that you used to create the instance configuration.

The WebServerTemplate2 instance that we created is no longer needed. Feel free to terminate that instance. Let's take a look at our load balancer now. Notice that the Overall Health section is currently marked as Unknown. That’s ok at first. It takes a few minutes for the load balancer to correctly perform all health checks and to update the OCI console.

While you are waiting for the load balancer to update itself, feel free to use your web browser to view each of the public IP addresses that are currently in your instance pool. You. can quickly get these public IPs by viewing the list of compute instances.
Before too long (a minute or two) the auto-scaling policy will start to take effect. If you take a look at your instance pools, you will see the state marked as SCALING. That’s because the auto-scaling policy is already scaling down an instance.

If you click on the web_server_pool to view it’s details, you can see that the CPU usage is very low. So the auto-scaling policy has kicked in to remove one of the servers from the pool. In 5 minutes (300 seconds), the policy will check again and will remove a second instance, reducing the number of running instances in the pool to the minimum number defined for the pool, one.

Wait a few minutes until the number of instances in your pool is one.
While we are waiting, let’s take a look at our load balancer. It is now reporting that its overall health is OK.

Copy the public IP address of the load balancer and paste it into your browser. Refresh the page several times and you will see the responses returned from each of the active compute instances. Eventually, only a single compute instance will be handling the load.
Ok, so we’ve seen the auto-scaling policy work for reducing the number of servers when the web traffic load is low; now let’s see it scale up the number of servers as we increase the CPU utilization on one of the servers.
Take a look at the compute instances in your list and get the public IP address of the last running instance in your pool. You can always tell which instance is from a pool because its name will always start with the text “inst-”. If you are running multiple instance pools, then you will find it easier to open the details page of the instance pool that interests you and click on the Created Instances link on the left side of the page.

Get the public IP address of the last running instance in your pool and SSH into that instance. Now we are going to increase the CPU utilization of that one server (and by extension, the instance pool) by issuing the following command:
stress -c 2
That will run the stress application and provide enough CPU load to drive the utilization to 100%. This will, in turn, trigger the auto-scaling configuration to add another server to the pool. Wait just a moment and then navigate to the detail page of your compute instance. You will see a sharp rise in the CPU graph on the Metrics sub-page.

Similarly, if you view the Metrics for the instance pool, you will see the same thing:

That load definitely exceeds our 70% limit, so in another 5 minutes or so a new instance will be added to the pool.

You can easily confirm the addition by using your browser to hit the load balancer and see the differences in the IP address of the server that fulfills the request.
Conclusion
As you can see, creating an auto-scaling configuration takes a bit of planning at first. Once you have everything configured, it’s a small matter to change the scaling rules and maximum number of servers. We did this for web servers because they are easier to setup and monitor, but these principles apply equally to application servers or any other technology. You can now take full advantage of the elasticity of the cloud in both it’s on-demand capabilities and minimizing your costs at the same time.